|
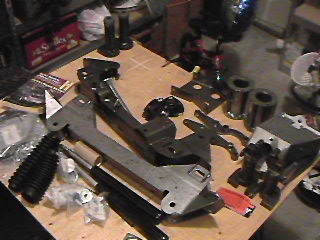
October 1st, 2002 Trailmaster 6" Suspension Lift I bought a TM 6" lift because they were advertising it for $677.00 which was a steal! MSRP was over $2000.00 for this kit so I just had to snag me one! Here is the kit:
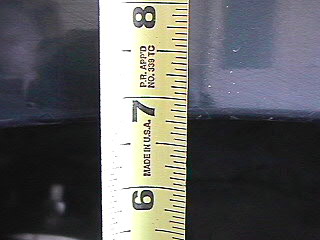
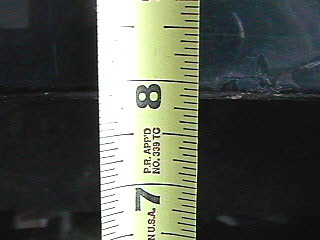
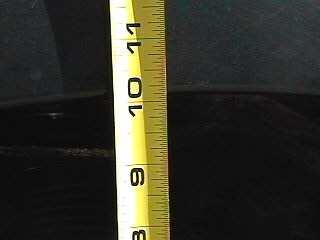
The install is going great. First I took some measurements from the top of my tires to the fender wells. The front only had 7 inches and the back 8 inches. The reason the front only has 7 is due to the weight of my winch.
Here are some pics before the lift went on. This is with my old Revtek 3" lift.
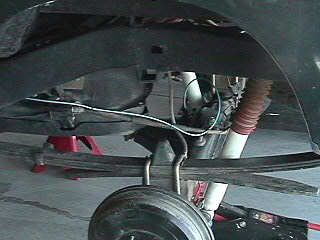
The rear installation went ok...some of the instructions could have been better especially when relocating the break lines but I made due with what I had. Here is a pic of the back just before I took it apart. The TM 6" lift comes with a 3" block and another leaf spring which should bring it up about 5-6" total. You can see my existing 3" Revtek block just under the leaf springs below. I took this block out and replaced it with the TM hardware (BTW the TM 3" block is about 3/8 inches higher than the Revtek 3" block)
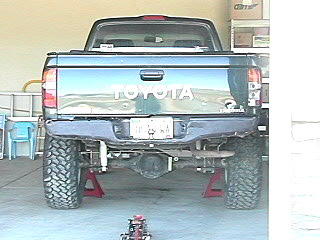
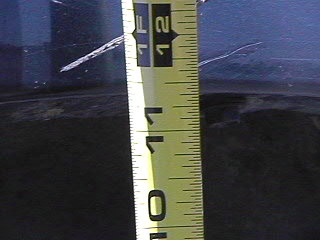
After getting everything done in the back I put the tires back on and it sits around 11 1/2" from the top of my tire to the wheel well. That is more than I suspected but I know it will settle a little after I start using it. Here is the truck with rear completed. Time to start on the front.
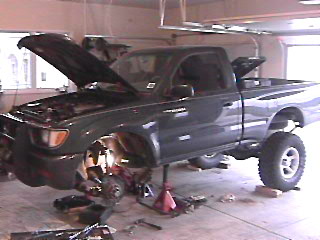
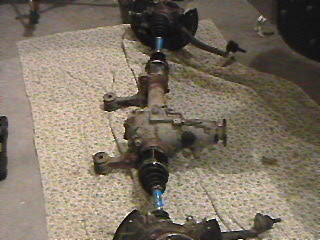
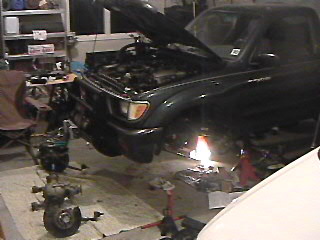
October 3rd. Today I took out the entire front suspension components including the upper and lower control arms, steering assembly and the front differential. The one thing to remember to buy is a size 12mm Alen wrench which I didn't have and was hard to find. I ended up finding one at Sears. They use it for the center bolt holding the front differential.
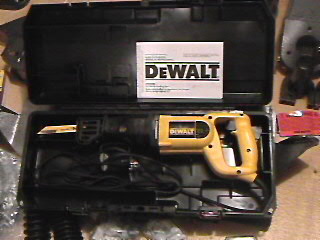
I'm ready to start cutting the crossmember out and putting the new parts in! I picked up the Dewalt 9amp reciporcating saw at Home Depot.
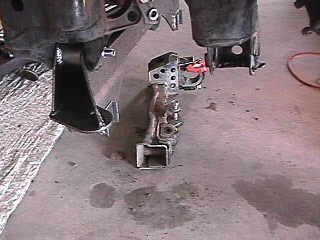
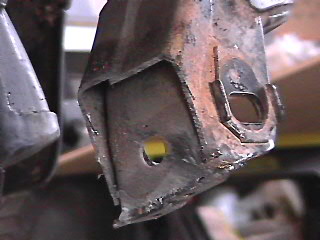
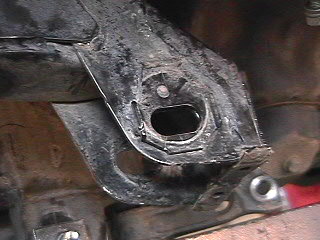
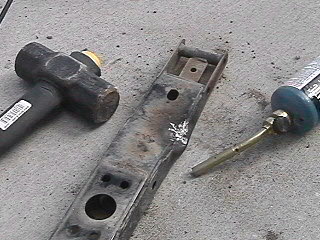
The next step was to cut out the cross member. Here is some pics of the crossmember with the cutouts.
Next step was putting in the new crossmember and mounting up the front diff. This was very easy. The rear crossmember needed to be modified a little to allow the drive axle to clear. They suggested heating up the area and bending it down a bit. Worked great.
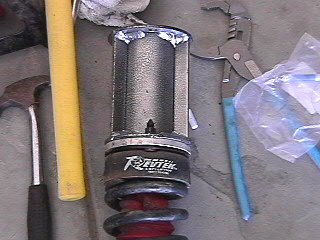
I have decided to just keep in my Revtek spacer above the coils so I can fit 35" tires next year. This should give me around 8 inches total in the front.
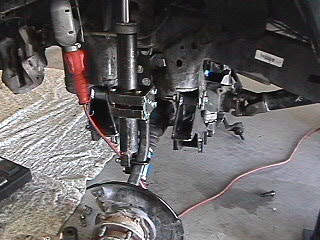
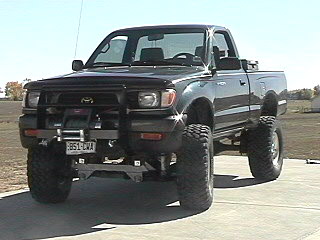
Next step is to put in the coil springs and steering assembly. I changed my mind about the spacer when everything was done and I threw back on the tires. It was so high in the front that everything looked dorky so I yanked that spacer out of the coils and ended up looking very nice! You can see I improved the trucks lift over 3.5" over the Revtek's lift. I did a test run and everything tested out perfectly.
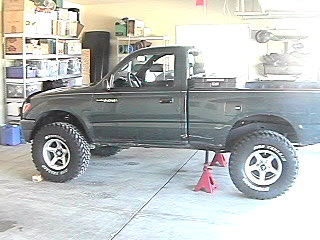
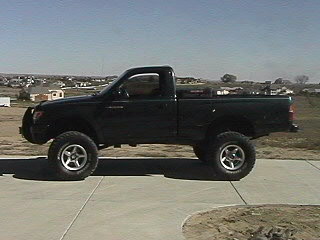
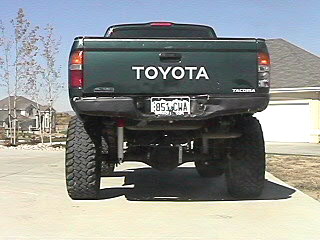
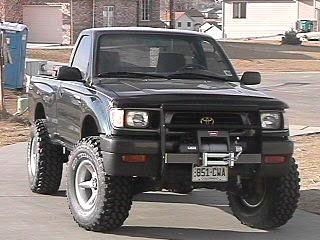
I called up Rancho and they suggested I get the RS99112 shocks for the rear based on the measurments I gave them. My total flex in the rear was 26" from eye to eye. The only thing I had to do is drill out the rubber eye to make them bigger. Overall I am very pleased with the kit. It took well over a week to install working a few hours each day. The cool think about this kit is now I can always add coil overs/spacers whenever I need more lift. The cv axles are perfectly straight now which is a good thing. Here's some before after shots that are similiar: BEFORE and AFTER:
BEFORE and AFTER:
|